{Picture:Repeat & Register artwork}
 I worked for a Screenprinter as an after school job a long, long time ago. They lady I worked for did all the printing etc, and I did all the 'extras', gluing fringing on sashes, folding T-shirts, etc.
You know, the type of job you have after school. Spend a couple of hours a few days a week to get some pocket money.
Mrs McLucas was the lady I worked for. She was my Art Teacher's wife. Then in later years, I worked for a commercial screenprinter a couple of times. Here I learnt how to coat a screen with emulsion and expose a screen in a 'dark' room. These are a little bit different to a photographer's 'dark' room.
When I read about the screen printing course on Sketch & Jones, I just knew I had to do it. Di Jones from Sketch & Jones mentioned in her blog that part of the day was learning how to expose your screen just using the sun. After years of working with the commercial screenprinter, I never realised you could do this. So for me, it was a revelation, because it meant I would be able to do my own screens at home.
Shivaun Leis was the lovely young lady teaching the day course. Shivaun, along with her brother Amon run Pete's Counter Sales in Leichhardt NSW. They mainly deal with industry, making and exposing screens for commercial purposes. They do some printing for clients.
Shivaun shows a real love for the art of screen printing and she has big dreams to bring it to the 'people'.
I didn't end up buying my screen that day because I needed to fiddle a bit with the artwork. I sent her a placement print and a repeat and register to check before the day. We ended up doing the repeat and register because the other 2 people in the class were doing placement prints.
Anyway, it was a great day, I learnt heaps and have since applied my knowledge.
On Thursday I called in to see Shivaun and collected a new screen, emulsion, a couple of pots of colour, a container of screen stripper (to clean the emulsion off), and some other helpful hints.
Being a four day weekend for me I plan to re-do my screen and expose the placement print also.
 Here I am (proudly in my Wallabies jumper) doing my second run of printing of the repeat and register.
 This is the artwork for the repeat and register. If you are unsure of what I mean, it's just basically a REPEAT of the pattern using one piece of artwork and making sure it REGISTERs when you place the artwork side by side and top to bottom. It needs to register all the way around the print to get an overall pattern. This artwork above is only a repeat of the A4 artwork.
 This is my placement print. This is a 'picture' as opposed to a repeat and register. This can be used as a feature on say the front of a cushion and then the repeat can be used on the back.
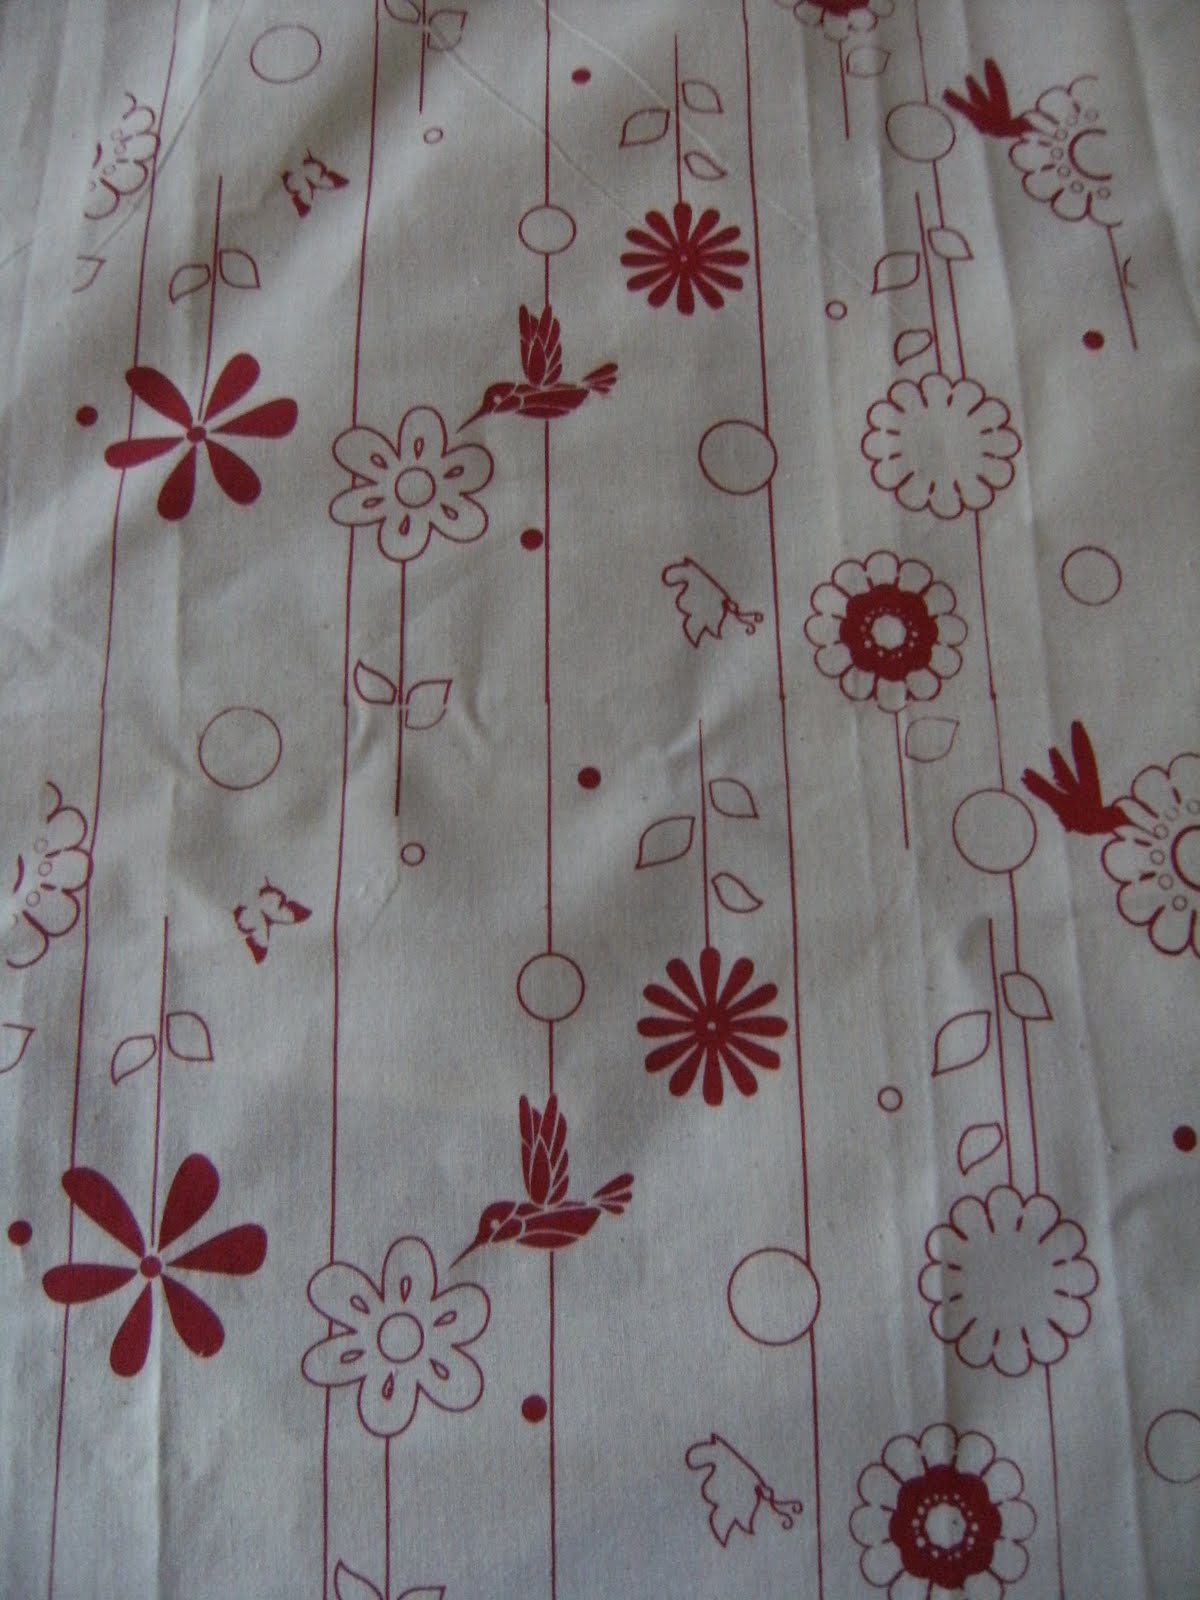 This was the final result on the day. It took a little bit of fiddling around to get it to match up as we weren't really working towards an 'expert' outcome, more to get the process down pat.
So I'm off to prepare some more screens with artwork I did back in 2008 when I completed my Diploma in Surface Design. Plus I have so many ideas for other artwork, I'm now back to not sleeping very well because my mind won't stop!
I love your design Terese. I am surprised that they have taught you to To me, it seems nearly impossible to line it up for printing, especially since fabric can move as it dries. We always cut our positives around motifs (not necessarily in straight lines) for perfect yardage printing!
ReplyDeleteThanks for your comment about my design Thea. It was a quick one a few days before I had to send it over to them.
ReplyDeleteI did have trouble lining it up. I might need to have a quick chat with you when I'm in QLD later this month.
regards Terese
oh this is so weird, part of my previous comment seems to be missing. I was trying to say that it seems strange that they taught you to cut straight through a motif.. but you probably got that.
ReplyDeleteI thought it was a bit 'unfinished', wasn't really sure what the missing bit was. I may have misled with my notation about them checking my artwork. They only checked it for the right format to print on transparency.
ReplyDeleteI actually completed the artwork based on what I was taught in my Surface Design Diploma a couple of years ago. Obviously I need to have that chat with you so I can make sure I'm not wasting my time or fabric.
No worries. I'll quickly show you how to correct this to avoid "ruined" fabric which will happen otherwise. Call me when you're in Brissie.
ReplyDeleteLooks great. Good on you Terese!!!
ReplyDeleteThanks Di. Will do anothet screen printing post when I have a few things made. Got a few things in mind to do on my holidays which start at the end of the month.
ReplyDeleteThis looks good!!
ReplyDeletethanks for the heads up about the filing cabinet on ebay, and I didn't go for it either cause it was in melbourne.