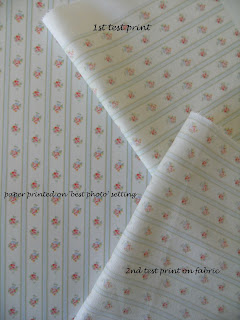
A couple of days ago I posted about my idea to try and print some fabric through my standard inkjet printer. I have a large format (A3) Epson and I thought it could handle it, as I can print up to 300 gsm paper weight.
This was the result, you can check out what I did here or click on the photo. Although the colours could have been a bit deeper, it was all I needed to complete the gift for Sophia.
So, this is how it all came together.
Lovely friends, Adrian and Fiona had Sophia Elizabeth on April 15, 2011. They didn't know the sex of the baby so it wasn't until she was born that my mind went into override about a gift. As luck would have it, it all came together on the day I left Brisbane. I stopped off at 'Coming up Roses' in Bulimba, a gorgeous gift shop owned by Hayley Lewis, close to where Brendon lives.

1. I had some adhesive lettering with a pearlescent finish.
2. The leaves have been made from the fabric I printed on the inkjet printer - as above, click on the link or the photo to see how I did it. The branch is a find from the garden, a gum tree twig wrapped in a pink ribbon and glued at each end.
3. A contrasting fabric as the background, here waiting for the glue to dry. It's been glued to a piece of cardboard (box card from an art store is a good weight for this). I find the tiny wooden pegs from craft stores (or Kikki K) are great to hold things in place while gluing.
4. The staple in crafting/artwork, an IKEA frame.
5. The three little guys who got me thinking about what to make for this special little girl. These are what I bought from 'Coming up Roses' in Brisbane. The designer is 'Alimrose Designs'.
And here it is!
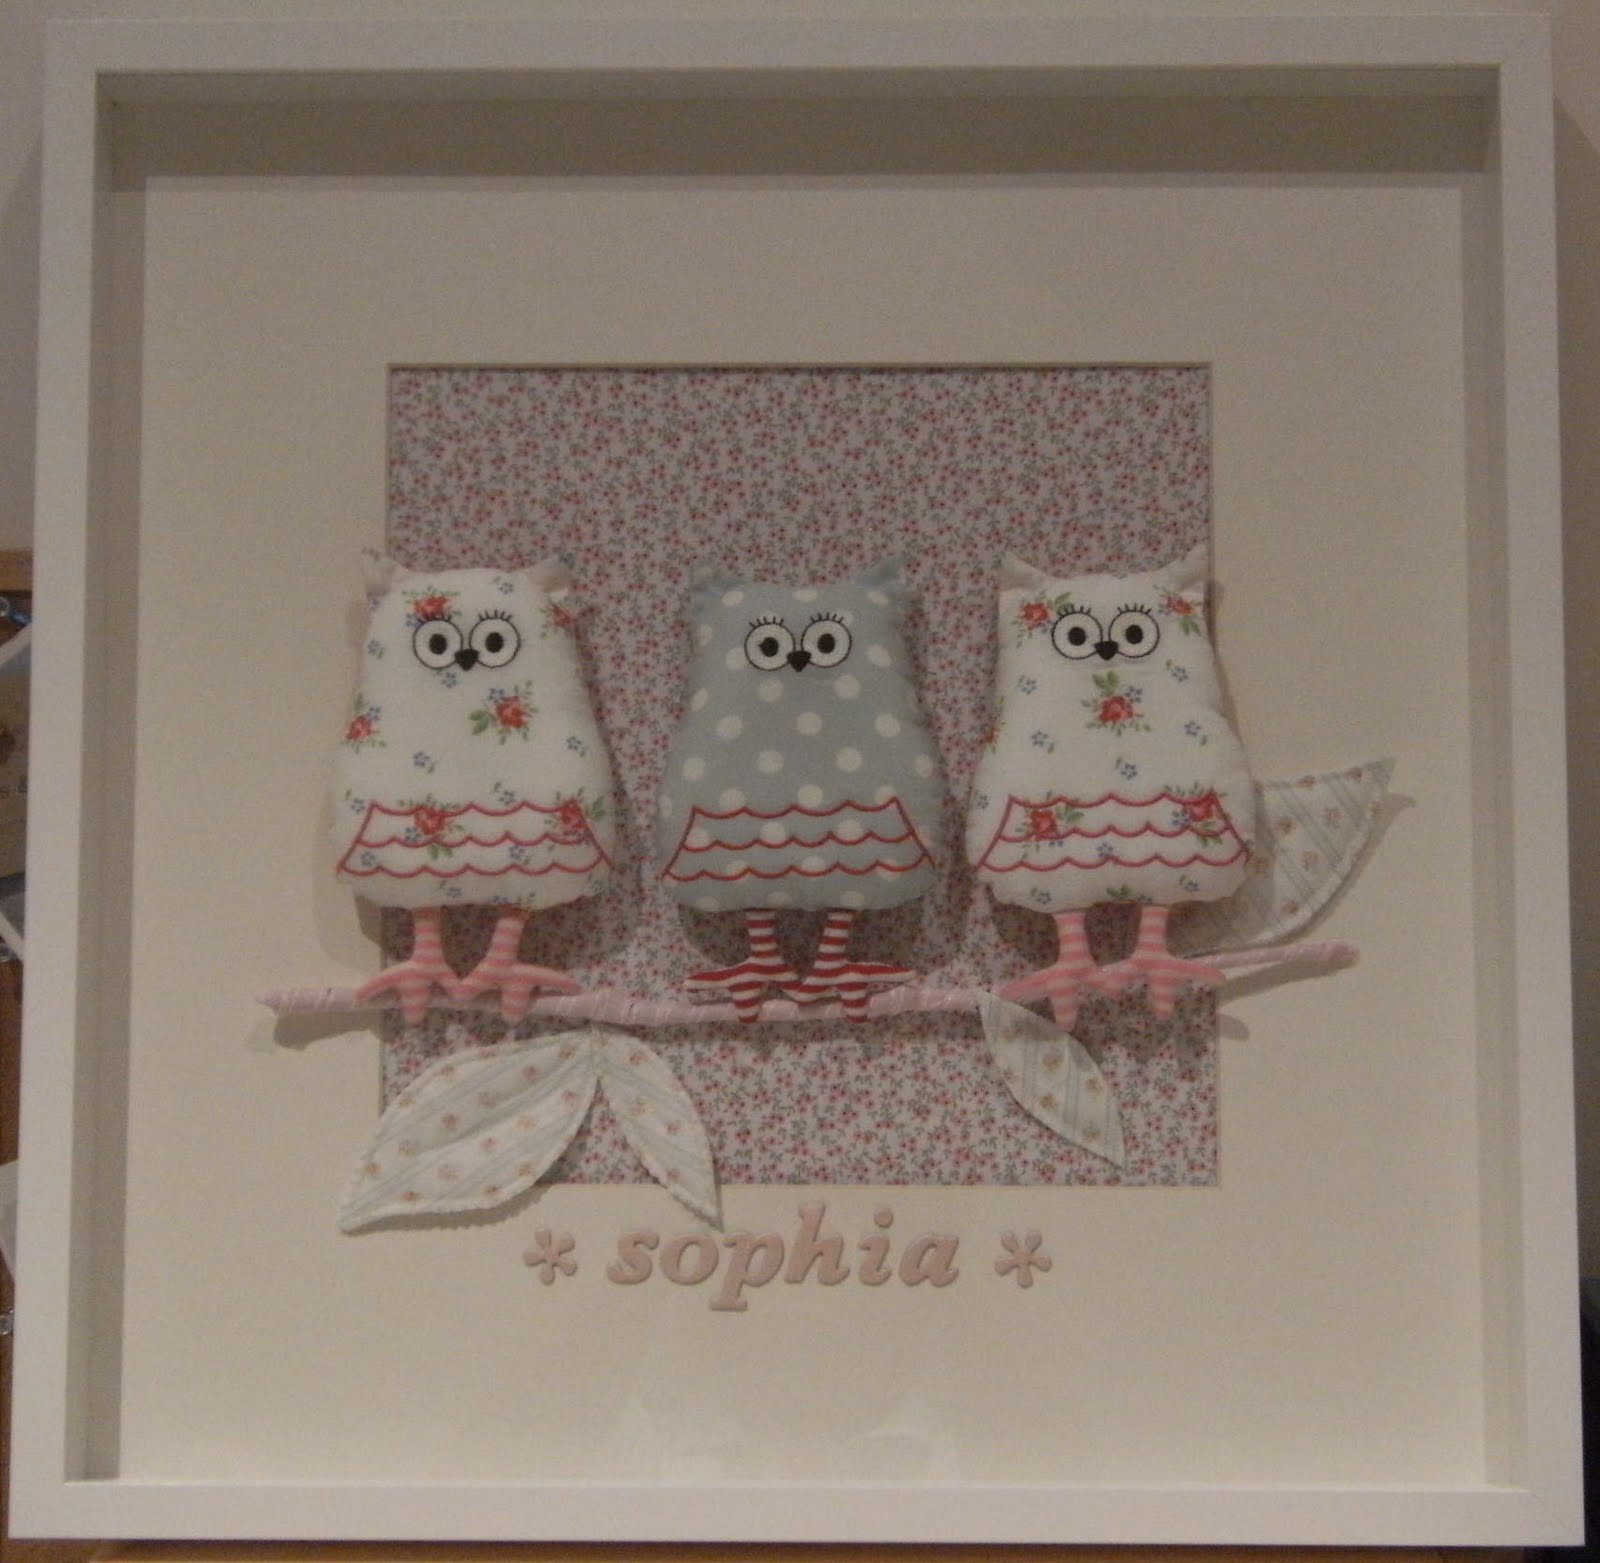
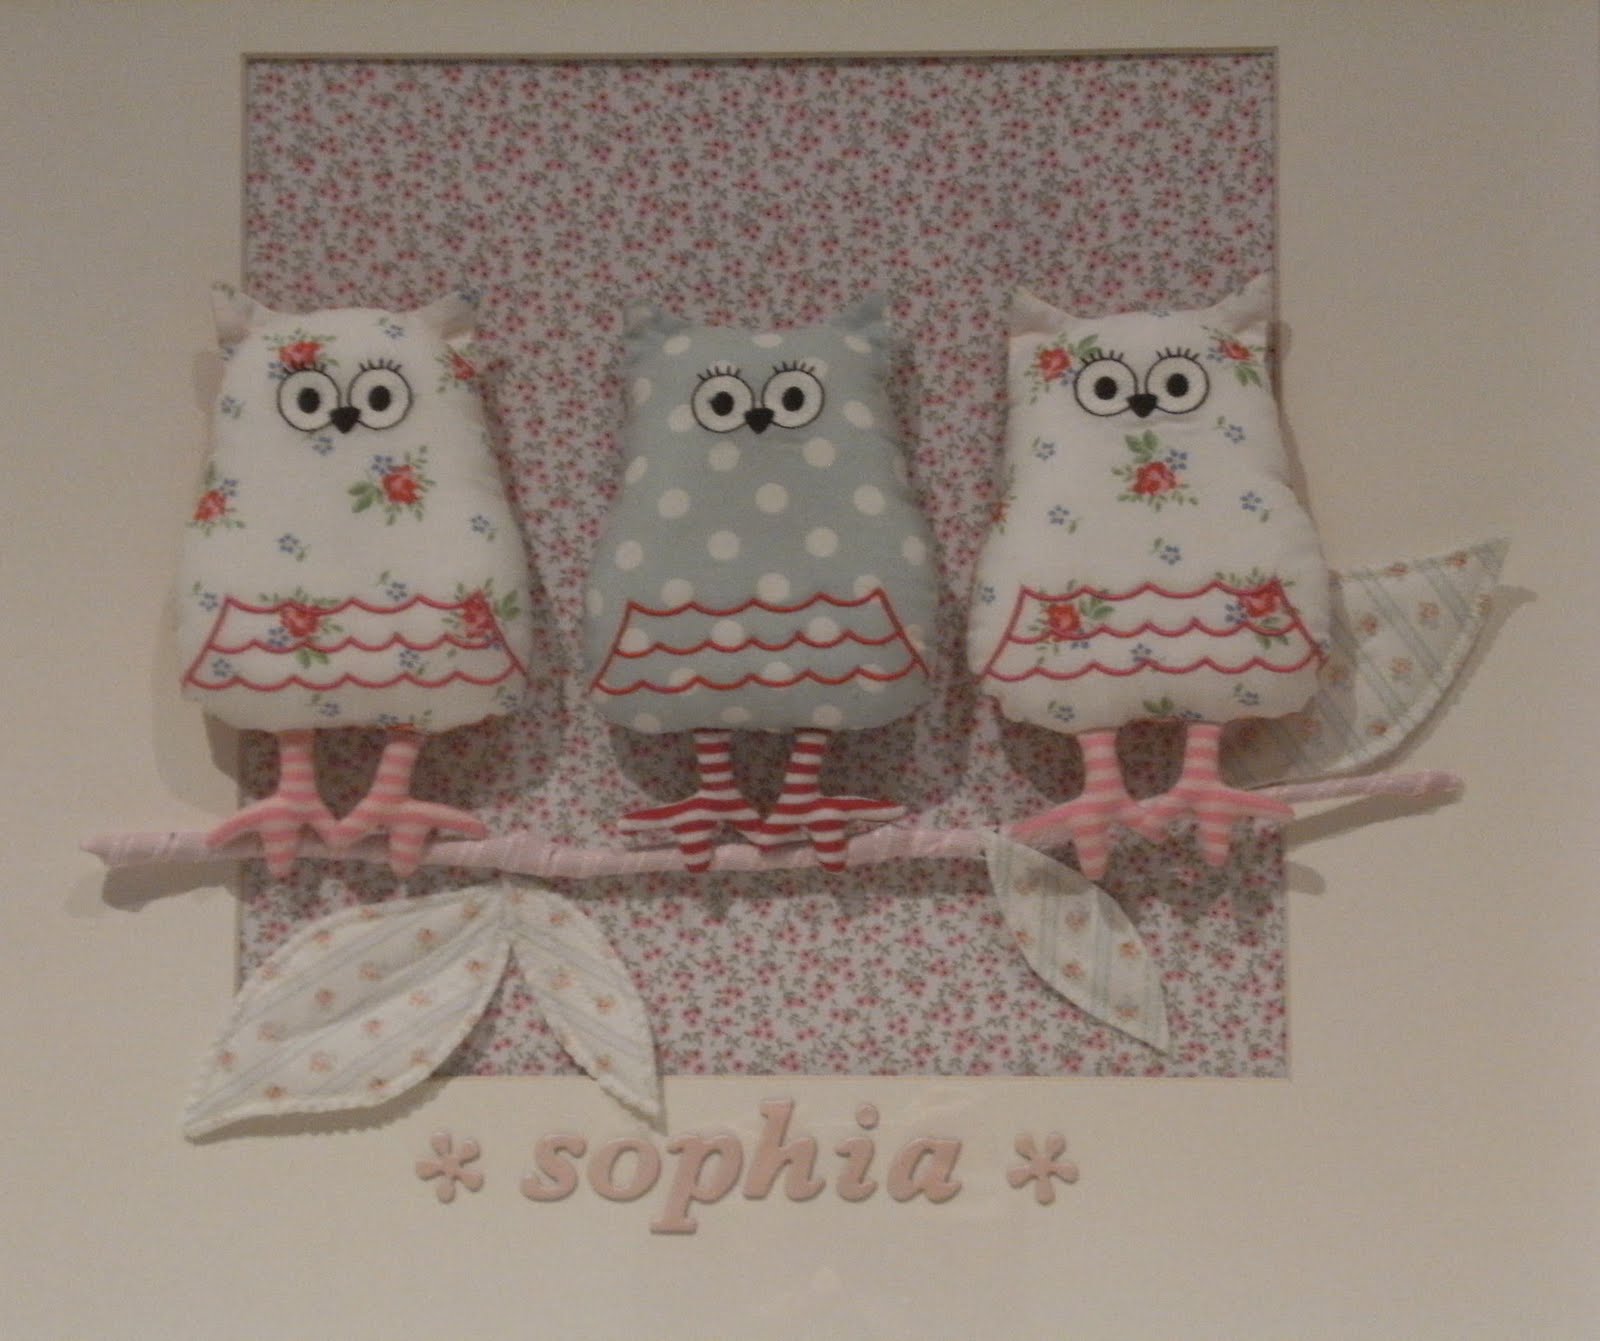

When I had all the pieces ready it was pretty easy to put together. The owls have been sewn to the backing fabric, which I forgot to tell you earlier, I had ironed some lightweight interfacing to, to give it some body.
I used a blanket stitch on my machine to make the leaves after I had ironed some adhesive wadding and fusing on. I just drew a shape on the fabric, cut it out then used the blanket stitch. Lastly I put in a vein using a normal straight stitch. It all just happened!
The leaves and twig are glued to the fabric backing with 'Tacky Glue' (PVA craft glue), when they were dry, I then glued the feet to the twig.
Artwork all done, with the final step to stick 'sophia' to the matt and fit it all in to the frame.
I love it! Hope you do too!
Well everyone, this is baby #2 news. The 1st was here if you missed it. The 3rd is much closer to home. Stay tuned... a couple of you already know what the news is. All will be revealed in the next day or so!

What a great idea, I bet you enjoyed making it too, looks very sweet.
ReplyDeleteWow, never thought the idea of printing fabric with A3 printer. And the end result is simply beautiful. Good job Teresa
ReplyDeleteYou put loads of effort into your gift. I'm sure the parents felt honoured and special.
ReplyDeleteTotally gorgeous! You clever thing T.
ReplyDelete